Why?
Here is a list of reasons why you should consider launching your WordPress website on localhost before uploading it to a web-host:
- It incurs no cost.
- It is the most secure platform for testing your website.
- No external influence is involved giving you the leverage of being as flexible as you want.
- You can perform more efficiently and quickly.
- You suffer no downtime.
But, before we go ahead with how you can setup a localhost environment for WordPress, it is first necessary that you should know what XAMPP is.
Step 1: Install XAMPP
As the first step, you should download and install XAMMP:
Related Post: XAMPP tutorial: Installation and first steps
Step 2: Download and Setting Up WordPress
To do that, you need to go to WordPress.org and download the latest version.
After downloading, Now install WordPress manually on XAMPP.
Unzip WordPress in the right folder under XAMPP.
In my case, it’s C:/xampp/htdocs. Rename it to whatever you like, but it’s recommended to give this folder the name of your site. I’m going to call this installation of WordPress wptest.

Now, go into your site’s WP folder, find the wp-config-sample.php file, and rename it wp-config.php.

Open the file and scroll down until you see the following lines:
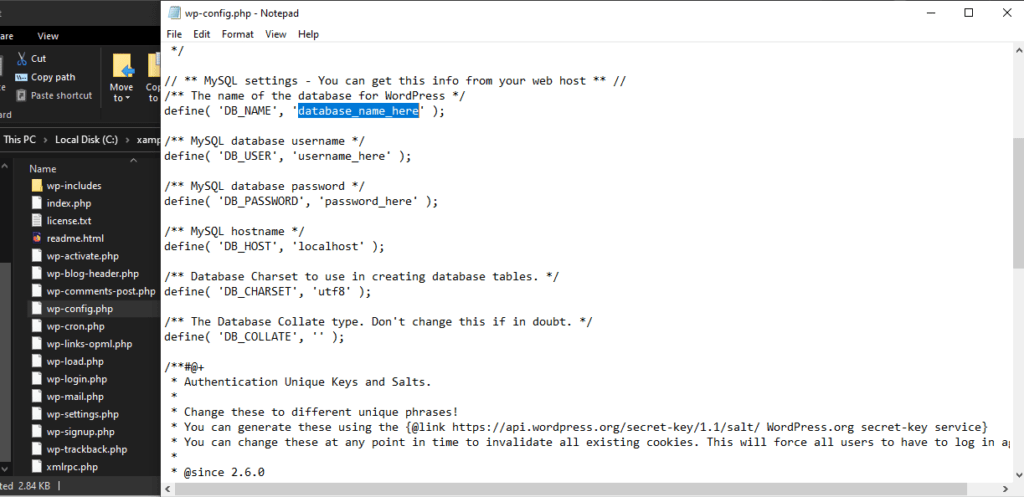
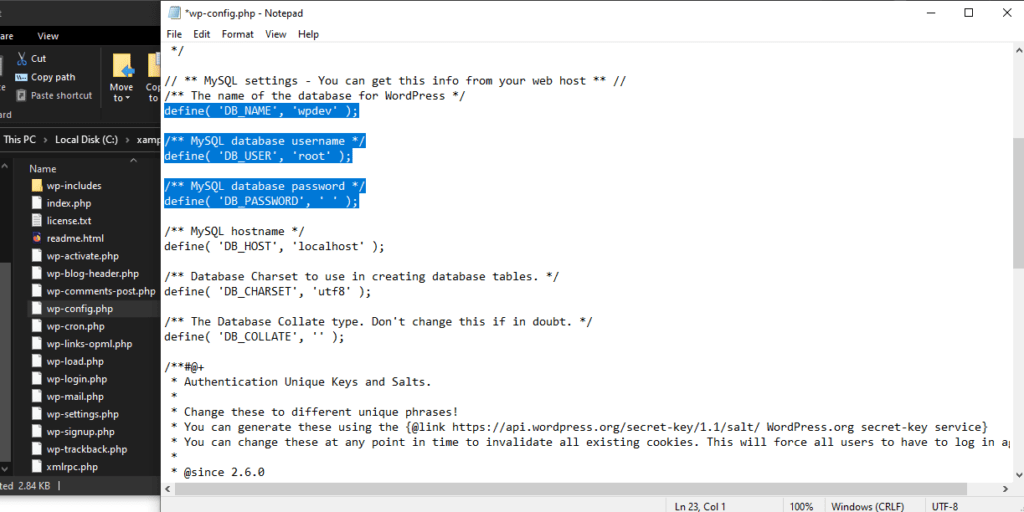
These lines of code define the login details for your database. Update them as per the instructions below:
- Replace“database_name_here” with the name of your database, which in my case is wpdev.
- Replace “username_here” with “root” and edit “password_here” field to be empty.
- Save the file and close it
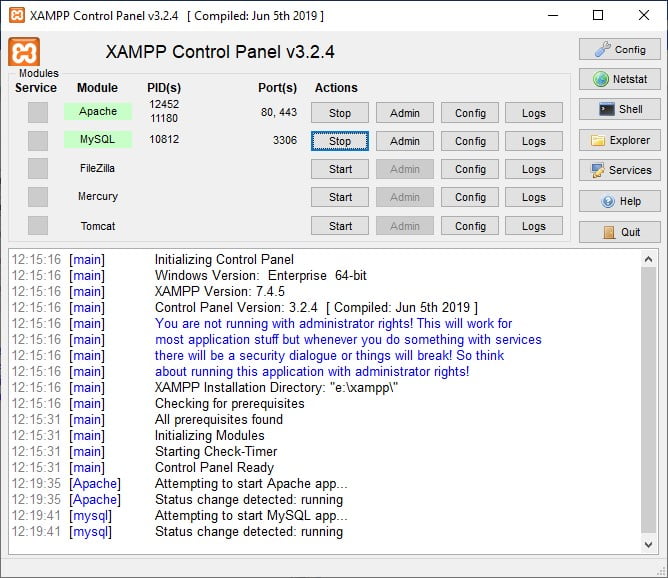
In the XAMPP control panel where you can turn on the components you need, and the most important for us is MySQL and APACHE, so turn it on by clicking Start.
Step 3: Creating A MySQL Database
Before we install WordPress, we need a database.
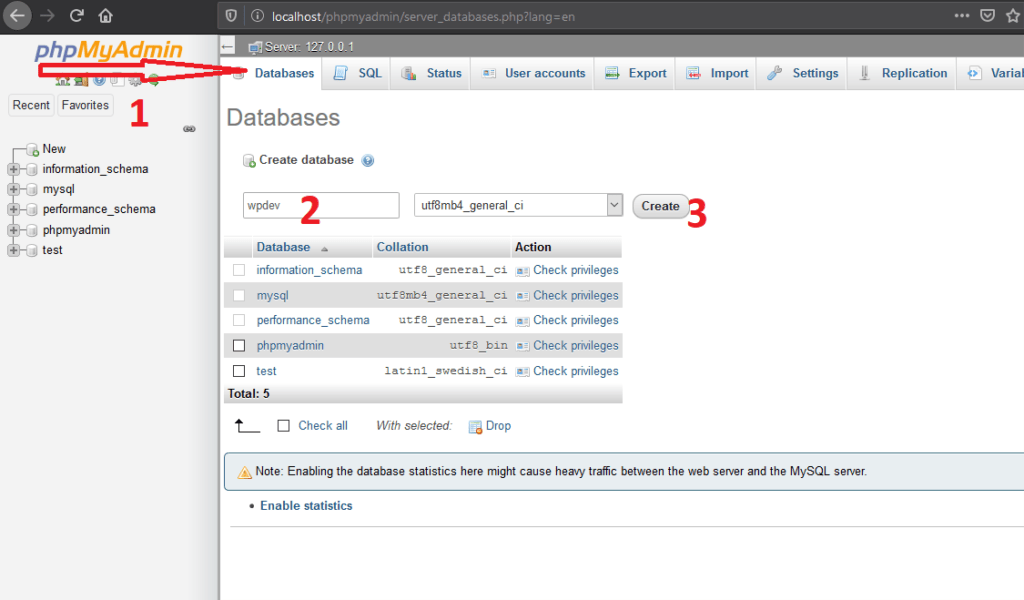
Now you have to open your browser and type in localhost. Only localhost and nothing else.

You will be navigated to phpMyAdmin window. It will automatically pop open on your screen. Click on Databases near the top-left.
You’ll now be prompted to create a new database. I’ve named mine wpdev.
Step 4: Install WordPress
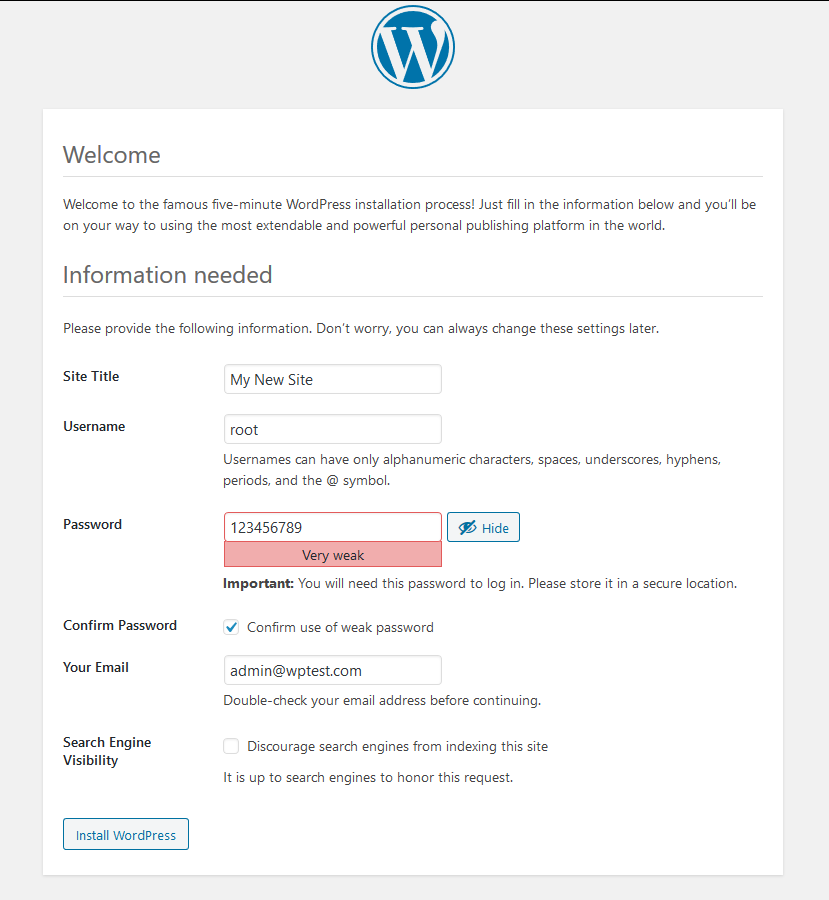
We can continue with our WordPress installation now. Open your browser and go to http://localhost/wptest/.
Choose a language.

Once you’ve chosen your language, continue into the next screen. Enter your site title, admin username, and password details. Click Install WordPress.
WordPress has been installed with success.

Login page http://localhost/wptest/wp-admin/
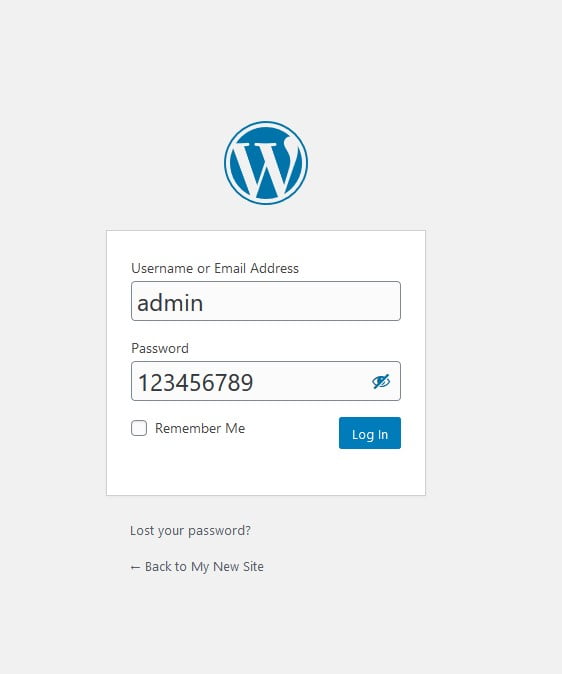
Congrats, you’ve successfully installed WordPress on your local server.
enjoy.