
XAMPP is a set of free software. The name is an acronym from the initials of all the components of this suite.
The latter brings together the Apache web server, the relational database and operating system MySQL or MariaDB as well as the script languages Perl and PHP.
The initial X represents all possible operating systems, namely Linux, Windows and Mac OS X.
Main components
- Apache: The Apache open source web server is used worldwide and delivers web content. The server application is made available in open source by the Apache Software Foundation.
- MySQL/MariaDB: With MySQL, XAMPP consists of one of the most popular relational database management systems in the world. In combination with the Apache web server and THE PHP script language, MySQL is used to record data for web services. Current versions of XAMPP favoured MariaDB without MySQL’s knowledge as a database manager, marking a detachment with mySQL.
- PHP: This is a server-side script language that allows you to create dynamic web pages or applications. PHP can be set up on all possible platforms and is compatible with various database systems.
- Perl: Perl script language is used for system administration, web development and network programming. In addition, dynamic web applications can be programmed in the same way as PHP.
Apart from the main components, Apache’s free distribution includes various tools for each operating system such as the Mail Mercury server, the PhpMyAdmin database administration application, Webalizer, OpenSSL, ApacheTomcat and FileZilla or ProFTPd data analysis software.
Application areas
A local XAMPP test system installs quickly and easily with a single file that can be executed in Linux, Windows and Mac OS X.
The software package contains the same components as those also used on common web servers. Developers have the opportunity to test projects locally and pass them on to productive systems comfortably.
However, XAMPP is not ideal as a public server because it has security restrictions.
Install XAMPP
Our XAMPP guide shows you how to install the software set on Windows. If you use Linux or Mac OS X, the installation process varies on the points presented:
Step 1: Download
XAMPP is made available by the non-profit Apache Friends project. Versions with PHP5.5, 5.6 or 7 are available for free download under apachefriends.org
Step 2: Launch a .exe file
Once the software is downloaded, start the installation with a double-click on the file with the .exe ending.
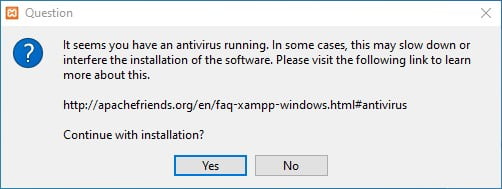
Step 3: Turn off antivirus programs
Because an active antivirus program can interfere with the installation process, it is advisable to temporarily disable these applications until all XAMPP components are successfully installed.
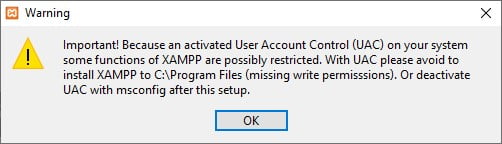
Step 4: Turn off UAC
User Account Control (UAC) may also interfere with the installation of XAMPP because the writing rights of drive C: are limited. The Windows support site tells you how to do this.
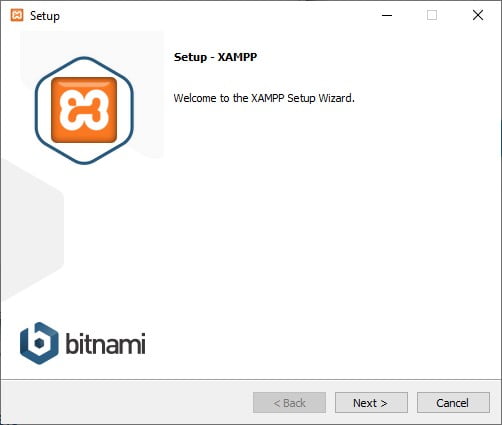
Step 5: Launch Setup-Wizard
Once the .exe file is executed and the security programs that hinder the installation are removed, the Setup-Wizard XAMPP start screen appears. Click next to set up the installation settings.
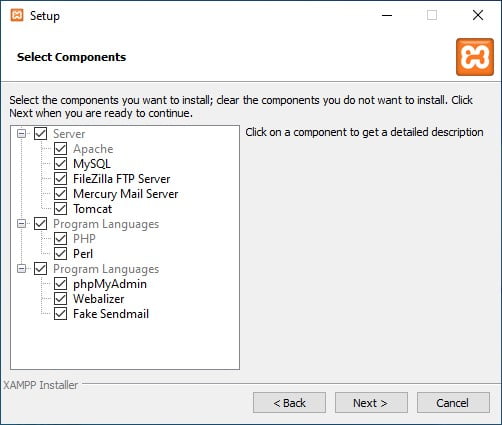
Step 6: Choosing software components
You can select certain components of the XAMPP set when installing under “choose the components.” In the case of a local test server we recommend that you opt for the standard settings that result in the installation of all available components. Confirm your choice by clicking “next.”
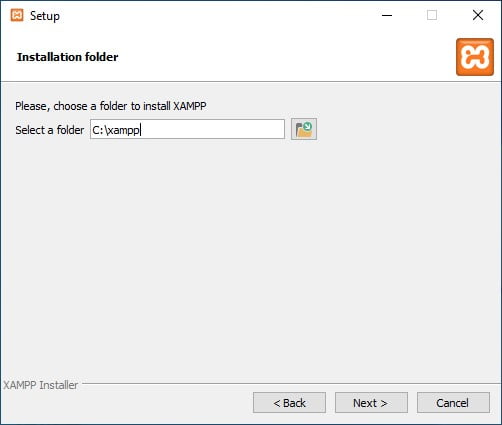
Step 7: Choosing the installation folder
The next step gives you the option to choose the folder where to install the software suite. By default, a folder named XAMPP is created under C:/.
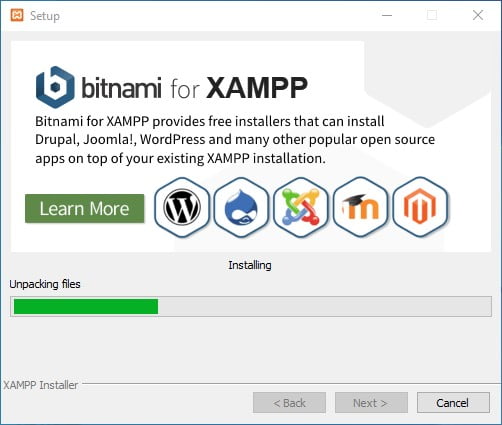
Step 8: Start the installation process
Once the default adjustments have been made, you start installing. The Setup-Wizard now decompresses the selected components and places them in the chosen repertoire. This process may take a few minutes. The progress of the installation is indicated via a green bar.
Step 9: Firewall Settings
In general, a message appears to let you know that your firewall is blocking the loading process. Check the corresponding boxes to allow the Apache server to be communicated with your private or business network. Keep in mind that it is not recommended to disable such protections for an XAMPP server in the case of a public network.
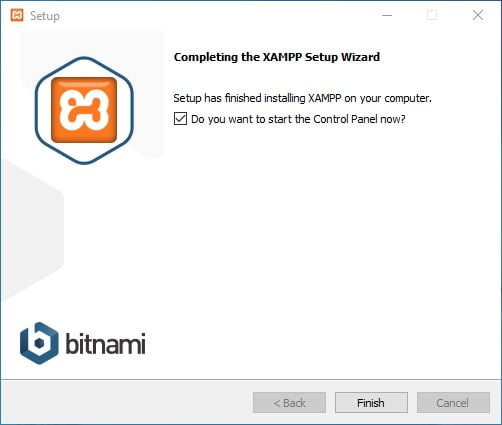
Step 10: Complete installation
Once all components are decompressed and installed, close the setup-wizard by clicking “finish.” To open XAMPP control panel following installation, check the corresponding box.
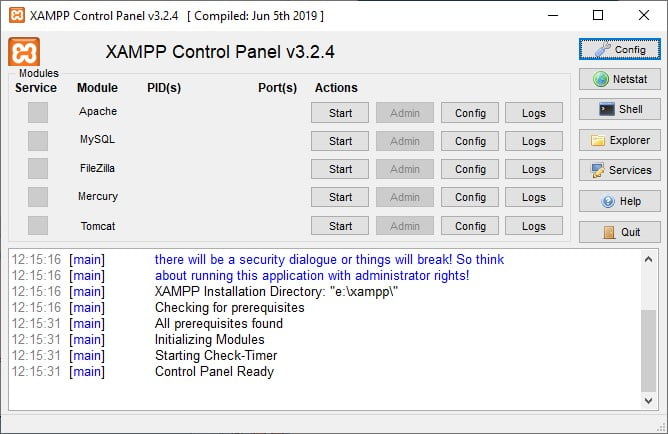
XAMPP Control Panel
XAMPP Control Panel lets you control the components of your test server. The clear interface collects all the actions and allows you to start or stop certain modules with a click. This interface offers various actions:
- Config: allows the configuration of your XAMPP as well as partial components
- Netstat: displays common processes on the local computer
- Shell: opens a UNIX cell
- Explore: Opens the XAMPP folder in Windows Explorer
- Services: Shows services running in the background
- Help: Offers links to user forums
- Quit: Close the XAMPP-Control-Panel
Launch the module
You can launch and stop each module from this interface in the “actions” column. Modules already started are highlighted in green.
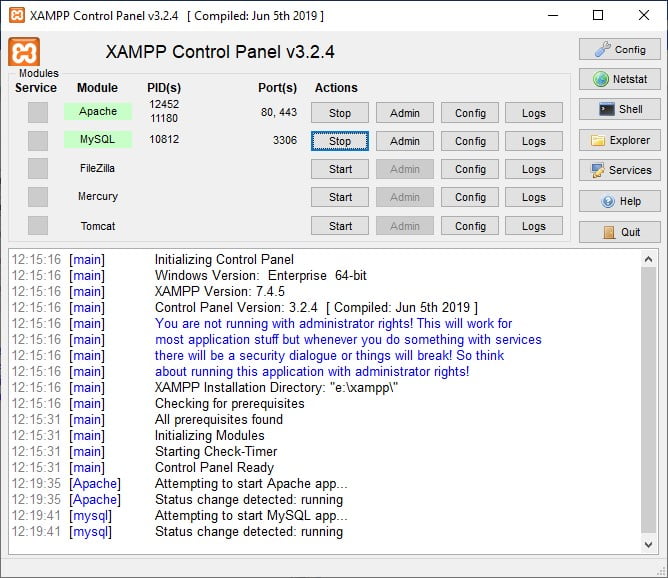
If a module cannot be launched due to an error, it appears highlighted in red on the XAMPP control panel. A detailed error report helps you identify the causes of such problems.
Administer modules
An administration area specific to each module of your XAMPP is available.
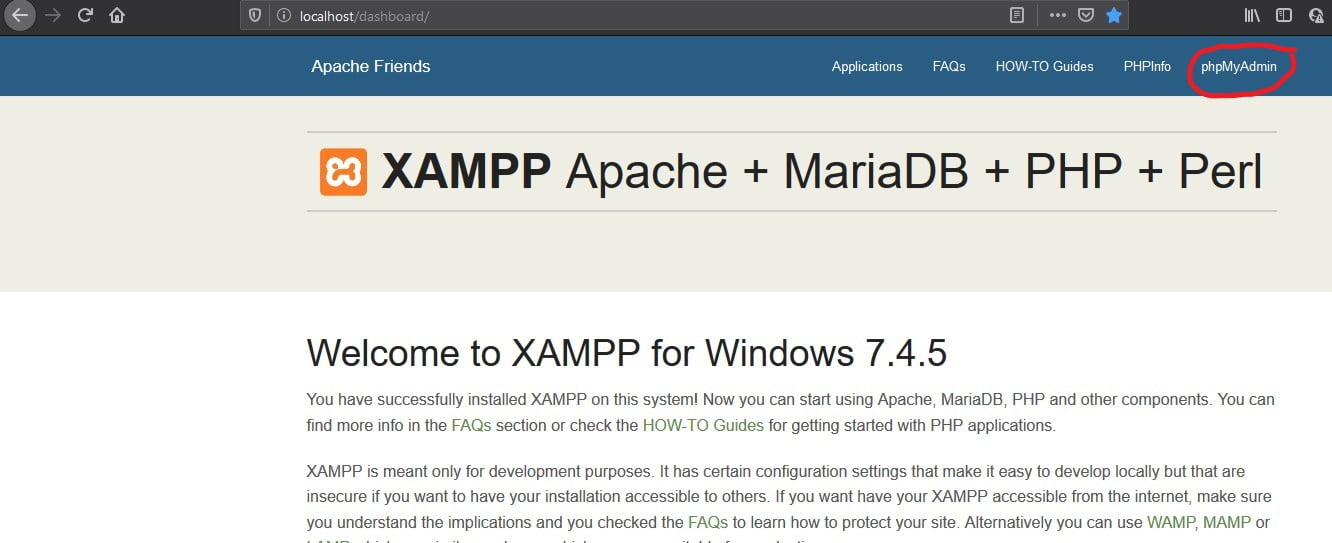
Click the Admin button on your Apache server to reach your web server’s URL. In this case, the Control-Panel launches your standard web browser. You are then directed to the dashboard of the local host of your XAMPP. The dashboard has many links to web pages with useful information as well as the open source BitNami project, which contains various free applications for your XAMPP like WordPress or other content management systems. Alternatively, you can access the dashboard under localhost/dashboard/.
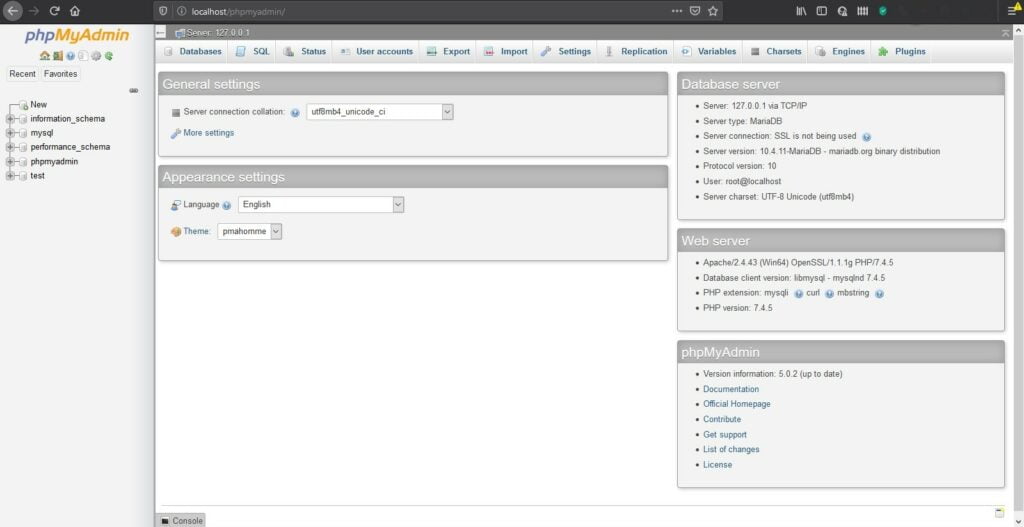
Use the admin button on your database module to open PhpMyAdmin. Here, you manage the databases of the projects you want to test on your XAMPP. You can also access the admin interface for your MySQL database under localhost/phpmyadmin/.
XAMPP test
Now create a simple PHP page with the following content in the editor and call the test.php in the test folder (C:\xampp\htdocs):
<html>
 <head>
  <title>PHP-Test</title>
 </head>
 <body>
  <?php echo '<p>Hello</p>'; ?>
 </body>
</html>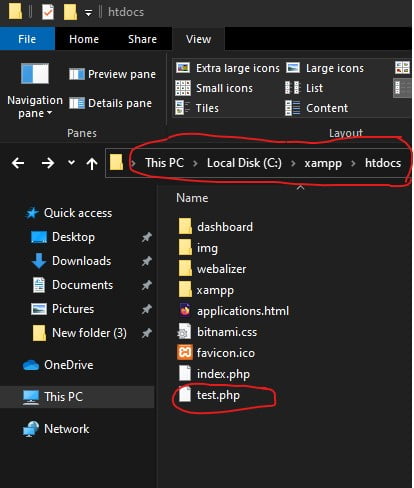
Open your web browser and load the PHP page under localhost/test.php. If your browser says “Hello,” your XAMPP is properly installed and configured.
